Tutorial
This is the tutorial for versions below 3.0. For the new tutorial, see here.
SFMVR_STITCH works by combining sets of stereo frames rendered at different fields of view into joined fulldome frames. This is necessary because a single render from SFM doesn't contain enough information to fill a fulldome frame, and SFM doesn't natively support wide-angle rendering. The FOV support is so bad that if you enter 180 FOV, the engine breaks. I found that 175 is the widest FOV it can render, so that's what my script uses.
This also means you will have to render your animation twice with different FOV settings (135 and 175). You will also want to render at full 1920 x 1080 resolution, which SFM doesn't enable by default.
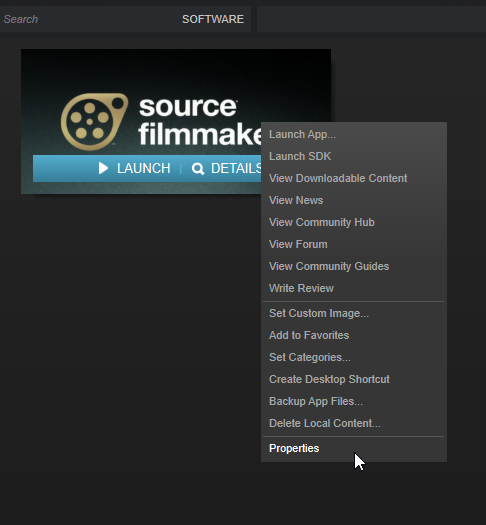
Right-click on SFM in Steam and click "Properties".
Click "SET LAUNCH OPTIONS"
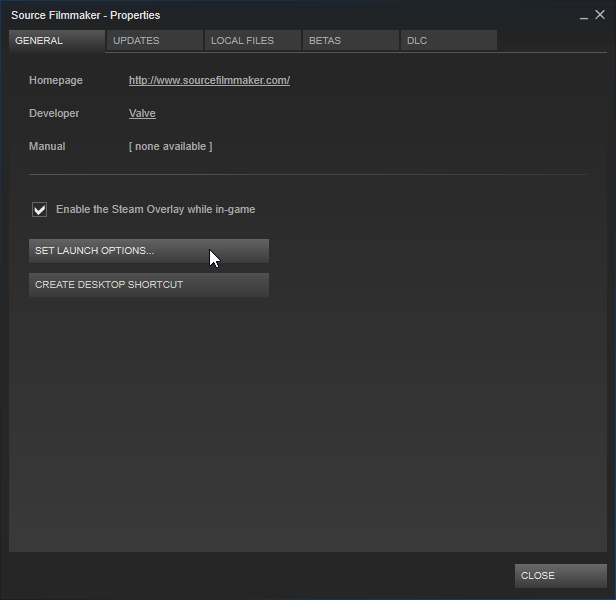
Enter "-sfm_resolution 1080" and click "OK"
(As of v1.62, you can now also enter "2160" here to enable 4K rendering!)

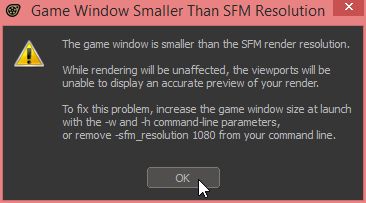
Launch SFM, and you will get a warning that you've locked yourself to 1080 rendering. It's fine. This is what we want.
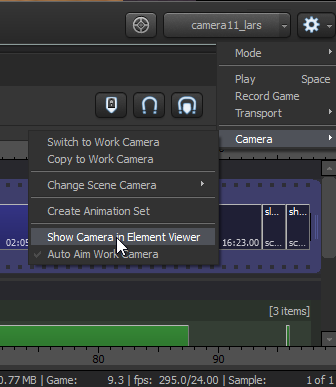
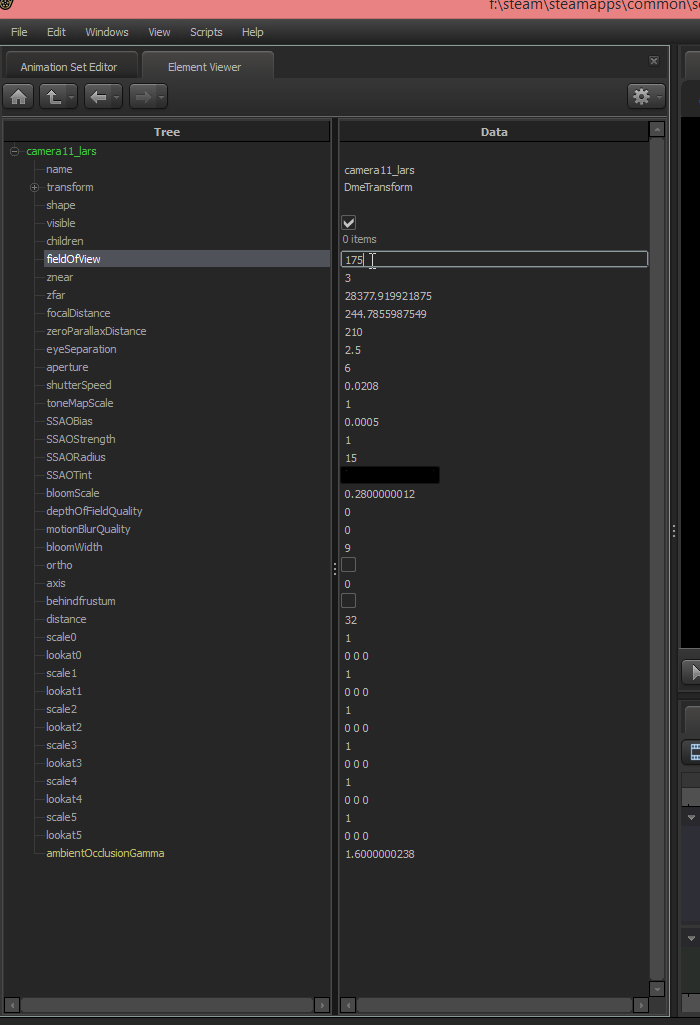
After selecting your clip, click the gear icon, then "Camera", and then "Show Camera in Element Viewer"
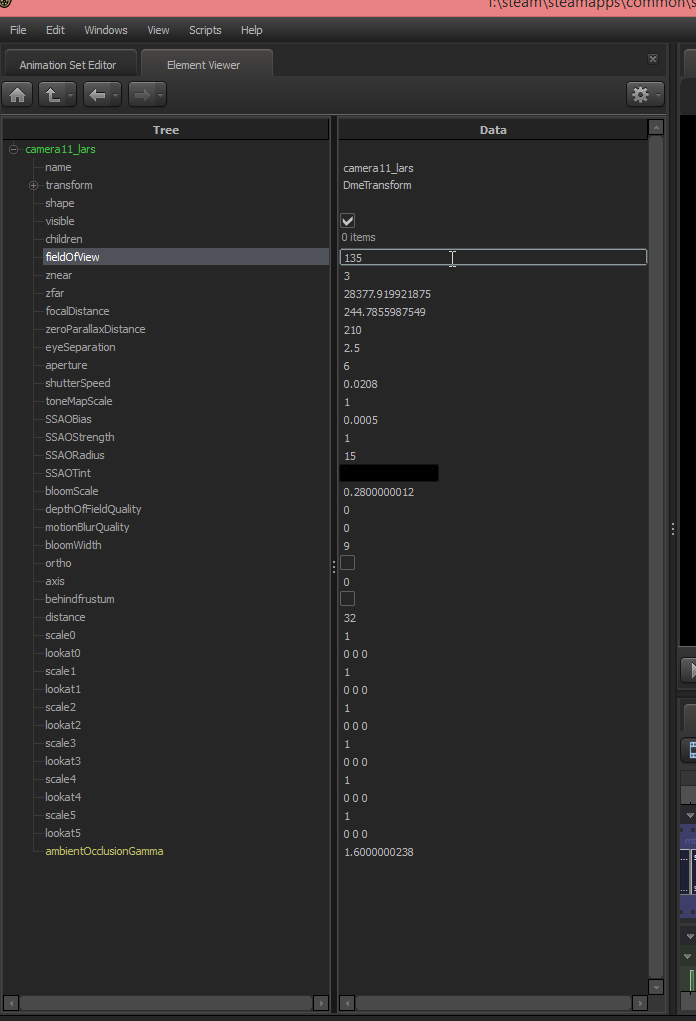
In the Element viewer, change your camera FOV to 135 Set znear to .1 if you can't get close enough to your models without clpping through them. Set eyeSeparation to 2.5 and set zeroParallaxDistance to 210. In testing, these numbers have worked best for models scaled to Team Fortress 2 character size. If the models are larger than TF2 scale, increase eyeSeparation to compensate.
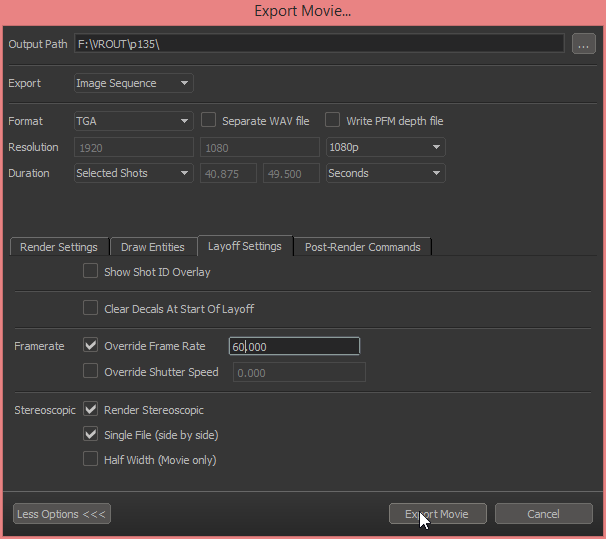
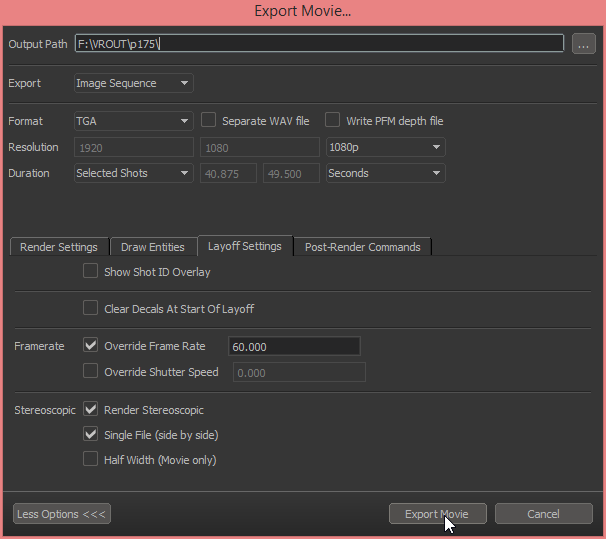
Export your movie as a TGA image sequence, at 1080p, and turn on "Render Stereoscopic" and "Single File (side by side)" under "Layoff Settings". We don't want TGA files, but we can't just render JPG images here because SFM will not generate SBS images if you export to JPG. WEIRD, RIGHT?
Consider overriding the frame rate (default of 24) to 60, because higher frame rates look better in VR.
And remember to:
- Disable motion blur
- Disable depth of field
- Disable film grain
- Disable bloom
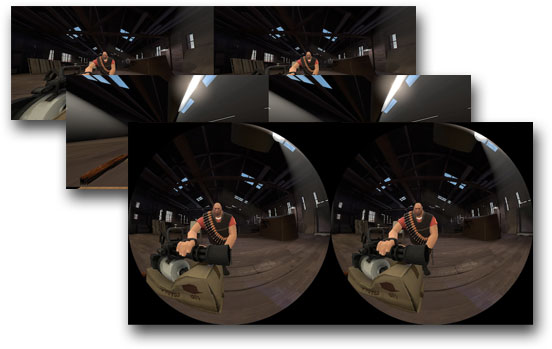
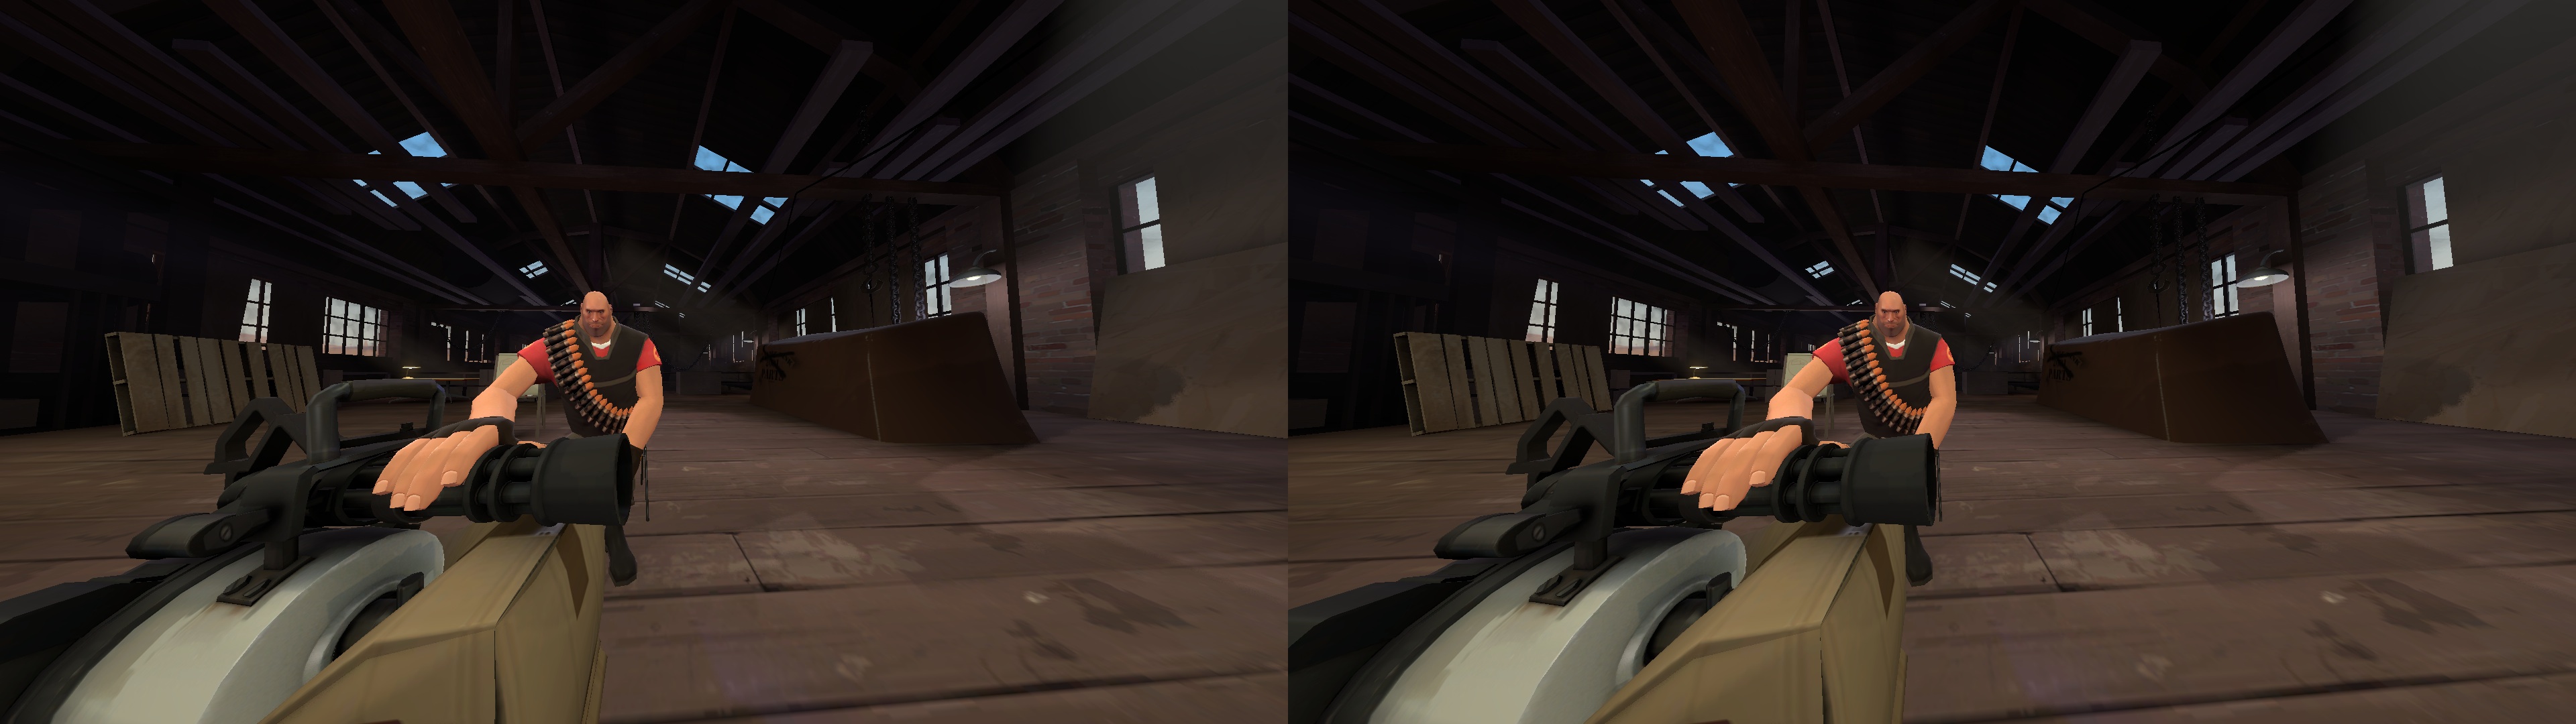
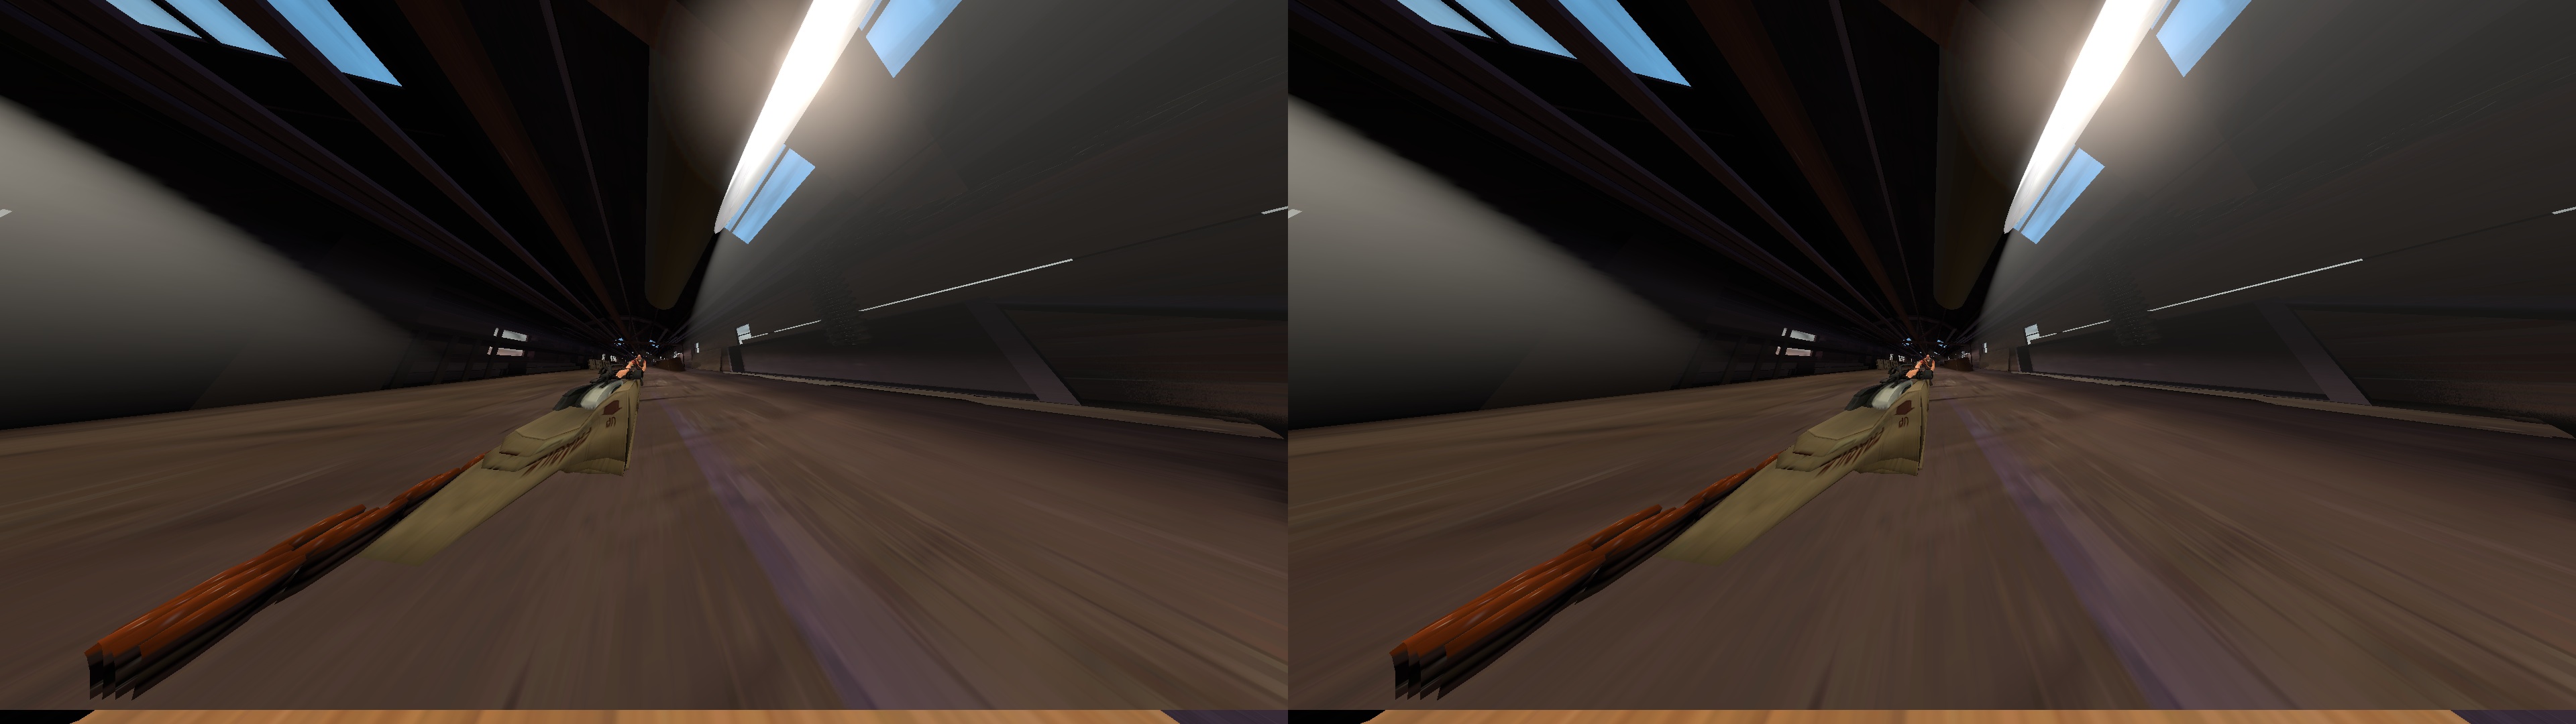
Your frames will look something like this.
Now change the camera FOV to 175. REMEMBER TO NOT MOVE THE CAMERA OR MAKE ANY OTHER EDITS AT THIS POINT, OR THE FRAMES WON'T LOOK RIGHT WHEN YOU STITCH THEM TOGETHER!
Export these frames to a different directory. Keep all the other settings the same.
Your frames will look something like this.
Now we need to convert all our frames to JPG images. We could process the TGA files directly, but SFMVR_STITCH loads TGA files very slowly. Converting all the images beforehand is much faster. I recommend IrfanView for batch conversion.
NEW: Reddit user /u/ThrowItAway2013 has created a patch to improve TGA load times! If you want to try this instead of converting to JPG, you can download his patch here. Just replace "\application.windows64\lib\core.jar" with "\processing-aspectj-patcher\target\core.jar"
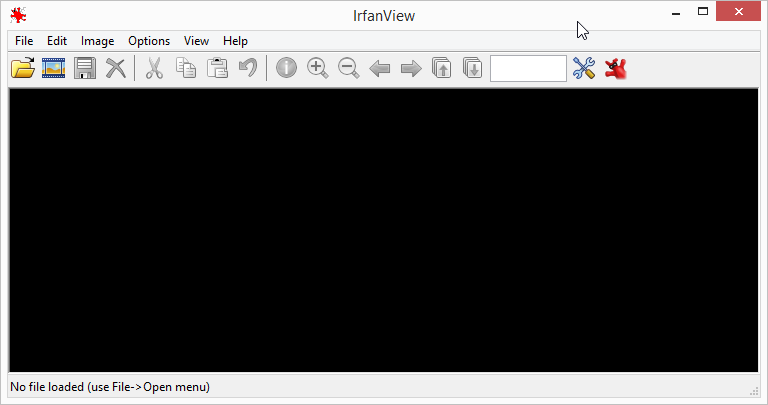
Open IrfanView and press 'b'. Navigate to your first folder, and click "Add All". Choose the output format "JPG - JPG/JEPG Format" and click Options. Drag the quality slider all the way over to "good". Click OK. If you want to automatically delete the old files during conversion, check the checkbox "Use Advanced options (for bulk resize...)" and click on "Advanced". Under "MISCELLANEOUS:" there will be a checkbox for "Delete original files after conversion". Click OK. Under "Output directory for result files:" click "Use current ("look in) directory". And finally click Start Batch.
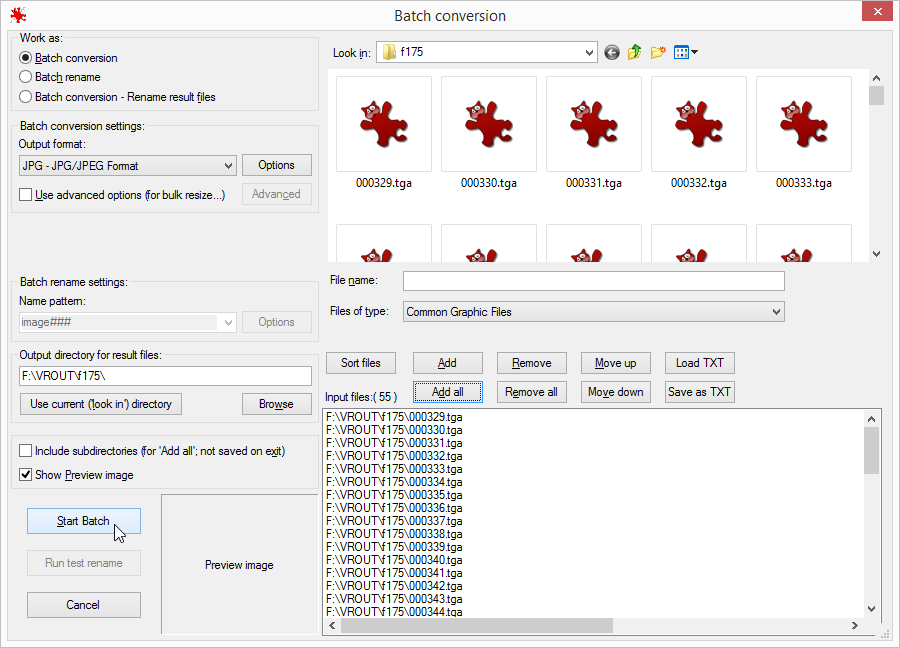
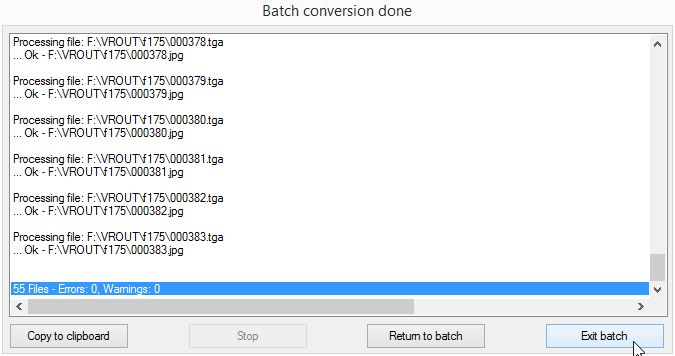
The batch process will run through your images pretty quickly. Repeat this for both folders.
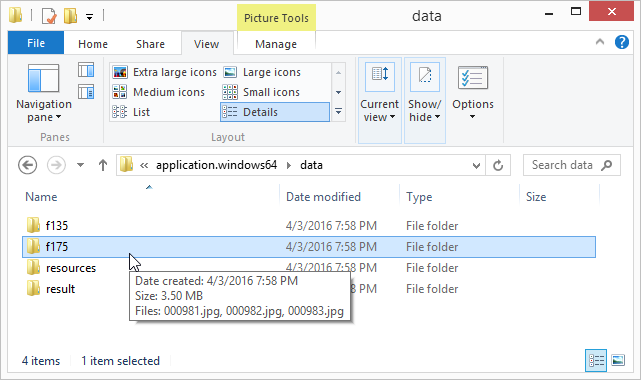
Now, put your frames in the "data/f135/" and "data/f175/" folders. SFMVR_STITCH comes with example frames from "Meet the Heavy". You will need to delete or move these. Your frames need to be the ONLY things in these folders. They will be matched in alphanumeric order, regardless of filename.
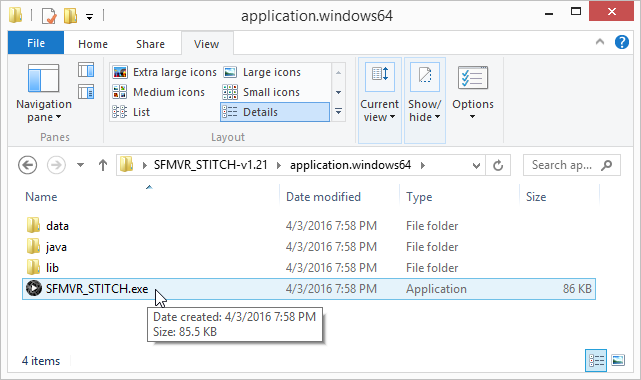
Run SFMVR_STITCH.exe
Follow the on-screen prompts about any missing directories or mismatched image counts. If there are any errors, you will need to close the program, make your corrections, and try again.
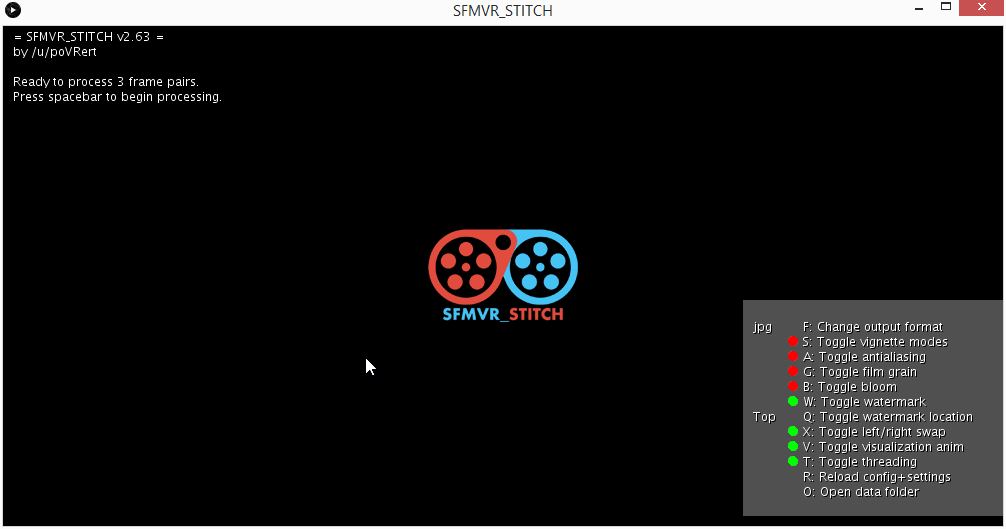
When prompted, press Spacebar to start processing the images. Before running a batch process, you can press "F" to toggle between JPG, PNG, TIF, and TGA export (JPG is default). You can press "X" to toggle swapping left and right eyes (for non-SFM programs that put the eyes on the correct sides). You can also press "T" to toggle threading (This stitches the left and right eyes in separate threads. It will be enabled by default if you are running on a multi-core processor). You can press "A" to toggle antialiasing (it is off by default, since it still has a few problems). You can press "W" to toggle the watermark, and "Q" to toggle its position. If you want to use your own watermark, you can find the image to edit in the data/resources/ folder.
See the changelog for a detailed explanation of new optons.
A confirmation message will appear in the upper-left when everything is finished.
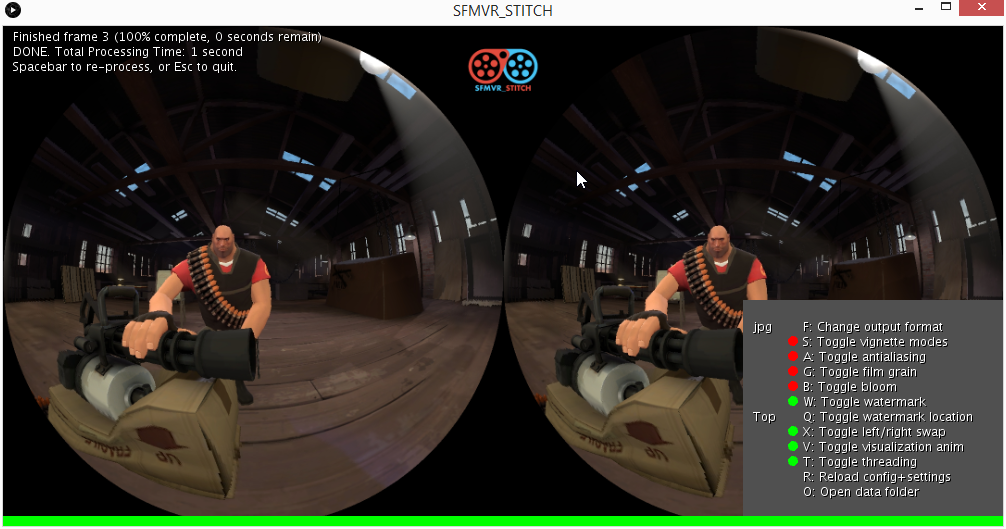
The final frames can be found in the data/result/ folder.
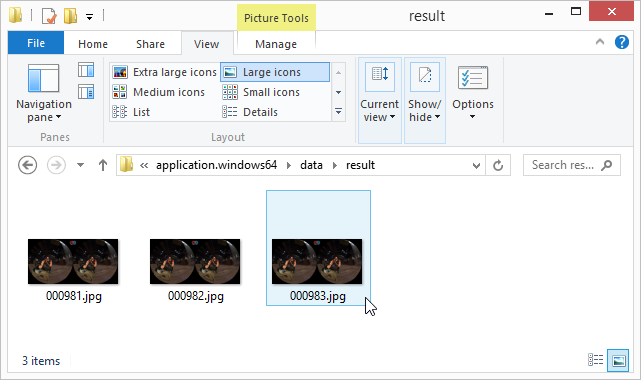
Use whatever tool you're already familiar with to make a video file from the frames. If you need help, VirtualDub is your friend. (Another tutorial approaches!)
Or do you have memcoder? COMMAND LINE TIME!
mencoder './*.jpg' -mf fps=60 -o output.mp4 -ovc lavc -lavcopts vcodec=libx264
FINAL NOTES
There is some distortion at the edges of the image. Sorry, but this is the best that this approach can do. Rendering at 4K improves the edges a fair amount, but it's not perfect. As of v2.63, you can try doing mixed resolution stitching. If you don't want to render everything at 4K, you can just render the 175 fov images at 4k and keep the 135 fov images at 1080p, and the final output will still be 1080p, but with more definition at the edges from the 4K wide angle images.
Don't care much for FXAA? Wish there was some other AA solution in here? I've got good news for you! The AA shader is exposed in the data/resources/ folder, so if you want to try implementing FXAAII, SMAA, MLAA, NFAA, SSAA, DLAA, NAACP, or you just want to put an emboss filter over everything, feel free!
Disappointed that you have to disable film grain and bloom in your renders because the effect breaks in 175 fov images? Don't worry: as of v2.63 you can now add bloom and film grain during stitching. And if you don't like the implementation of either effect, you can edit the shaders in the data/resources/ folder. And again, you can even replace them with emboss filters if you feel like it.
This script is free to use, but please send me a download link to anything you make with it ;-)
PM me on Reddit at /u/poVRert if you have any questions. Thanks!