Tutorial
SFMVR_STITCH works by combining sets of stereo frames rendered at different fields of view into joined wide angle equirectangular packed frames. This is necessary because a single render from SFM doesn't contain enough information to fill your entire field of view at an acceptable resolution, and SFM doesn't natively support wide angle rendering. There are some problems with setting a very high FOV in SFM as well.
What this all means is that you will have to render your animation twice with different FOV settings (135 and 175). I found that a FOV of 175 is the best trade-off for peripheral resolution and FOV. You will also want to render at full 3840 x 2160 resolution, which SFM doesn't enable by default. 4K renders are recommended, because lower resolutions look blurry on most modern HMDs.
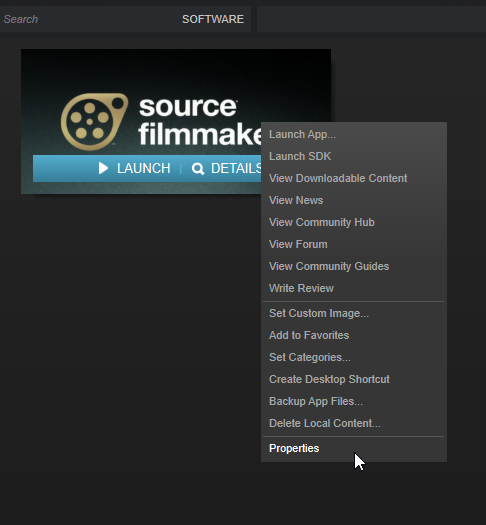
Right-click on SFM in Steam and click "Properties".
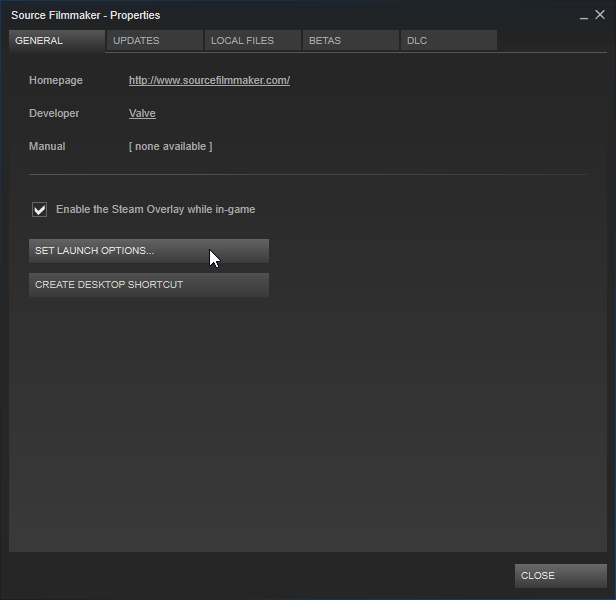
Click "SET LAUNCH OPTIONS"
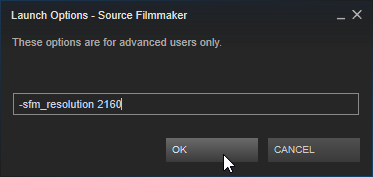
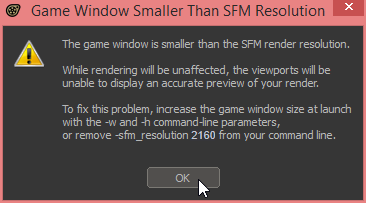
Enter "-sfm_resolution 2160" and click "OK"
Launch SFM, and you will get a warning that you've locked yourself to 2160 rendering. It's fine. This is what we want.
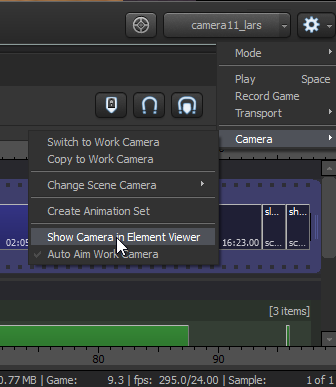
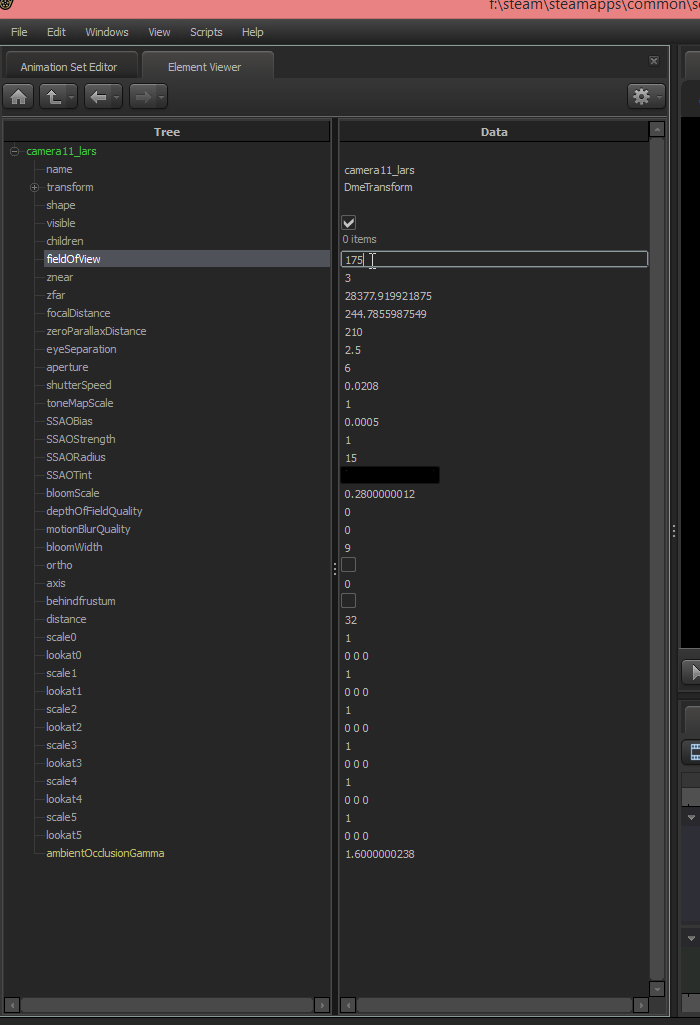
After selecting your clip, click the gear icon, then "Camera", and then "Show Camera in Element Viewer"
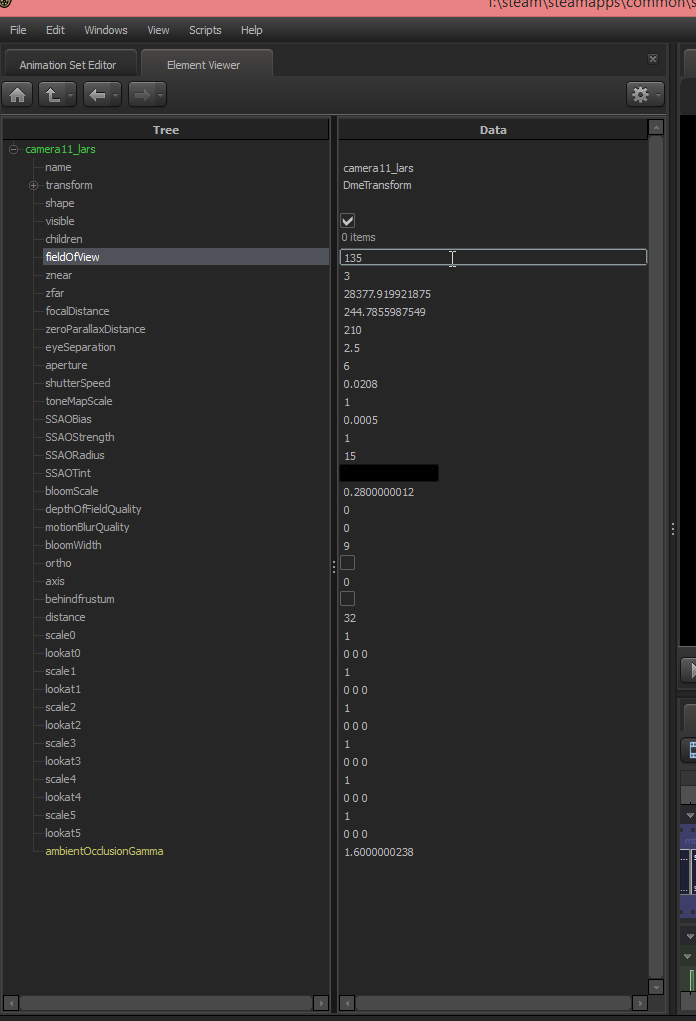
In the Element viewer, change your camera FOV to 135 Set znear to .1 if you can't get close enough to your models without clpping through them. Set eyeSeparation to 2.5 and set zeroParallaxDistance to 210. In testing, these numbers have worked best for models scaled to Team Fortress 2 character size. If the models are larger than TF2 scale, increase eyeSeparation to compensate.
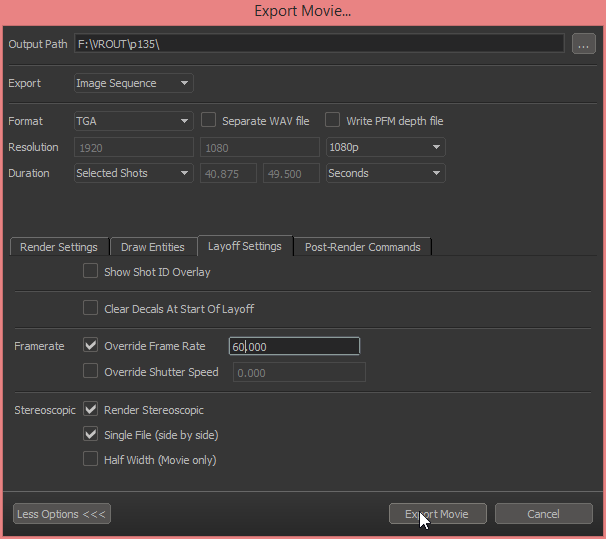
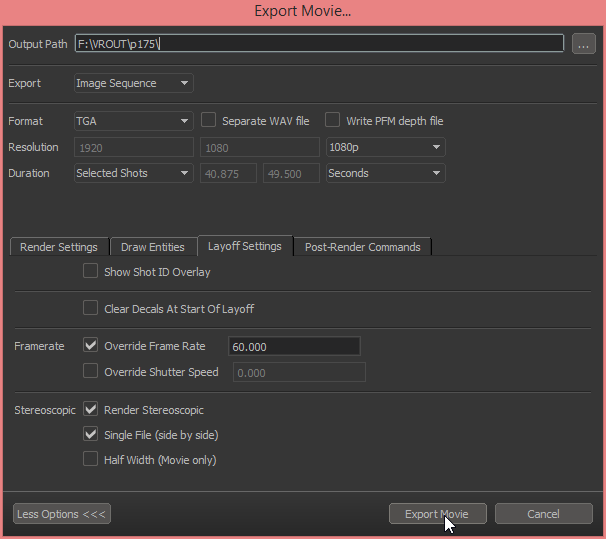
Export your movie as a TGA image sequence, at 2160p, and turn on "Render Stereoscopic" and "Single File (side by side)" under "Layoff Settings".
Change the frame rate (default of 24) to 60, because lower frame rates are unpleasant in VR.
And remember to:
- Disable motion blur (unnecessary with a high frame rate like 60, takes much longer to render)
- Disable depth of field (incompatible with wide angle rendering, takes much longer to render)
- Disable film grain (it looks splotchy and distracting after stitching)
- Disable bloom (won't stitch correctly)
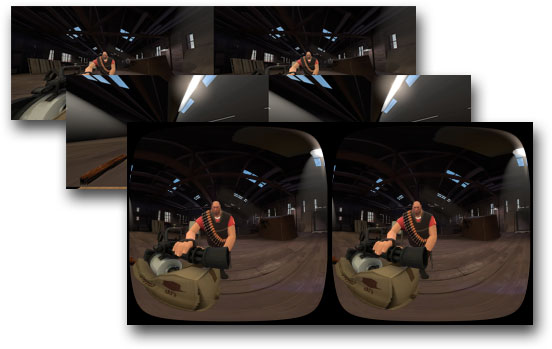
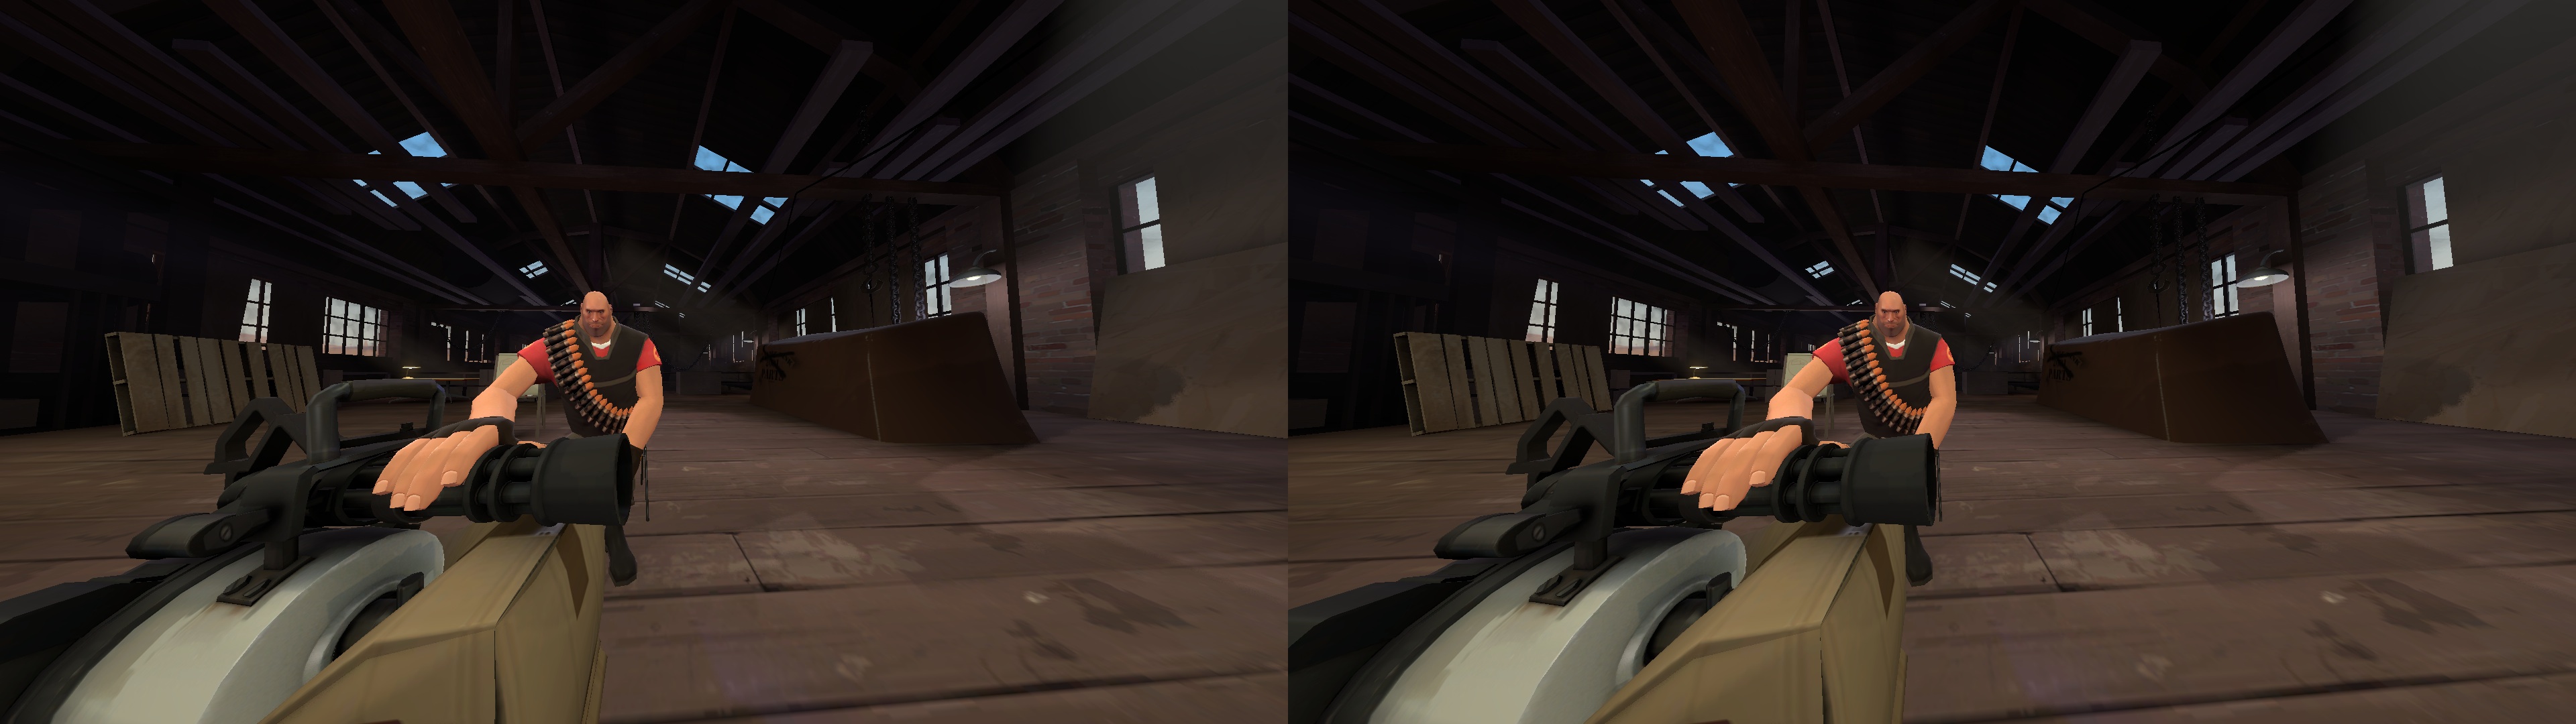
Your frames will look something like this.
Now change the camera FOV to 175. REMEMBER TO NOT MOVE THE CAMERA OR MAKE ANY OTHER EDITS AT THIS POINT, OR THE FRAMES WON'T LOOK RIGHT WHEN YOU STITCH THEM TOGETHER!
Export these frames to a different directory. Keep all the other settings the same.
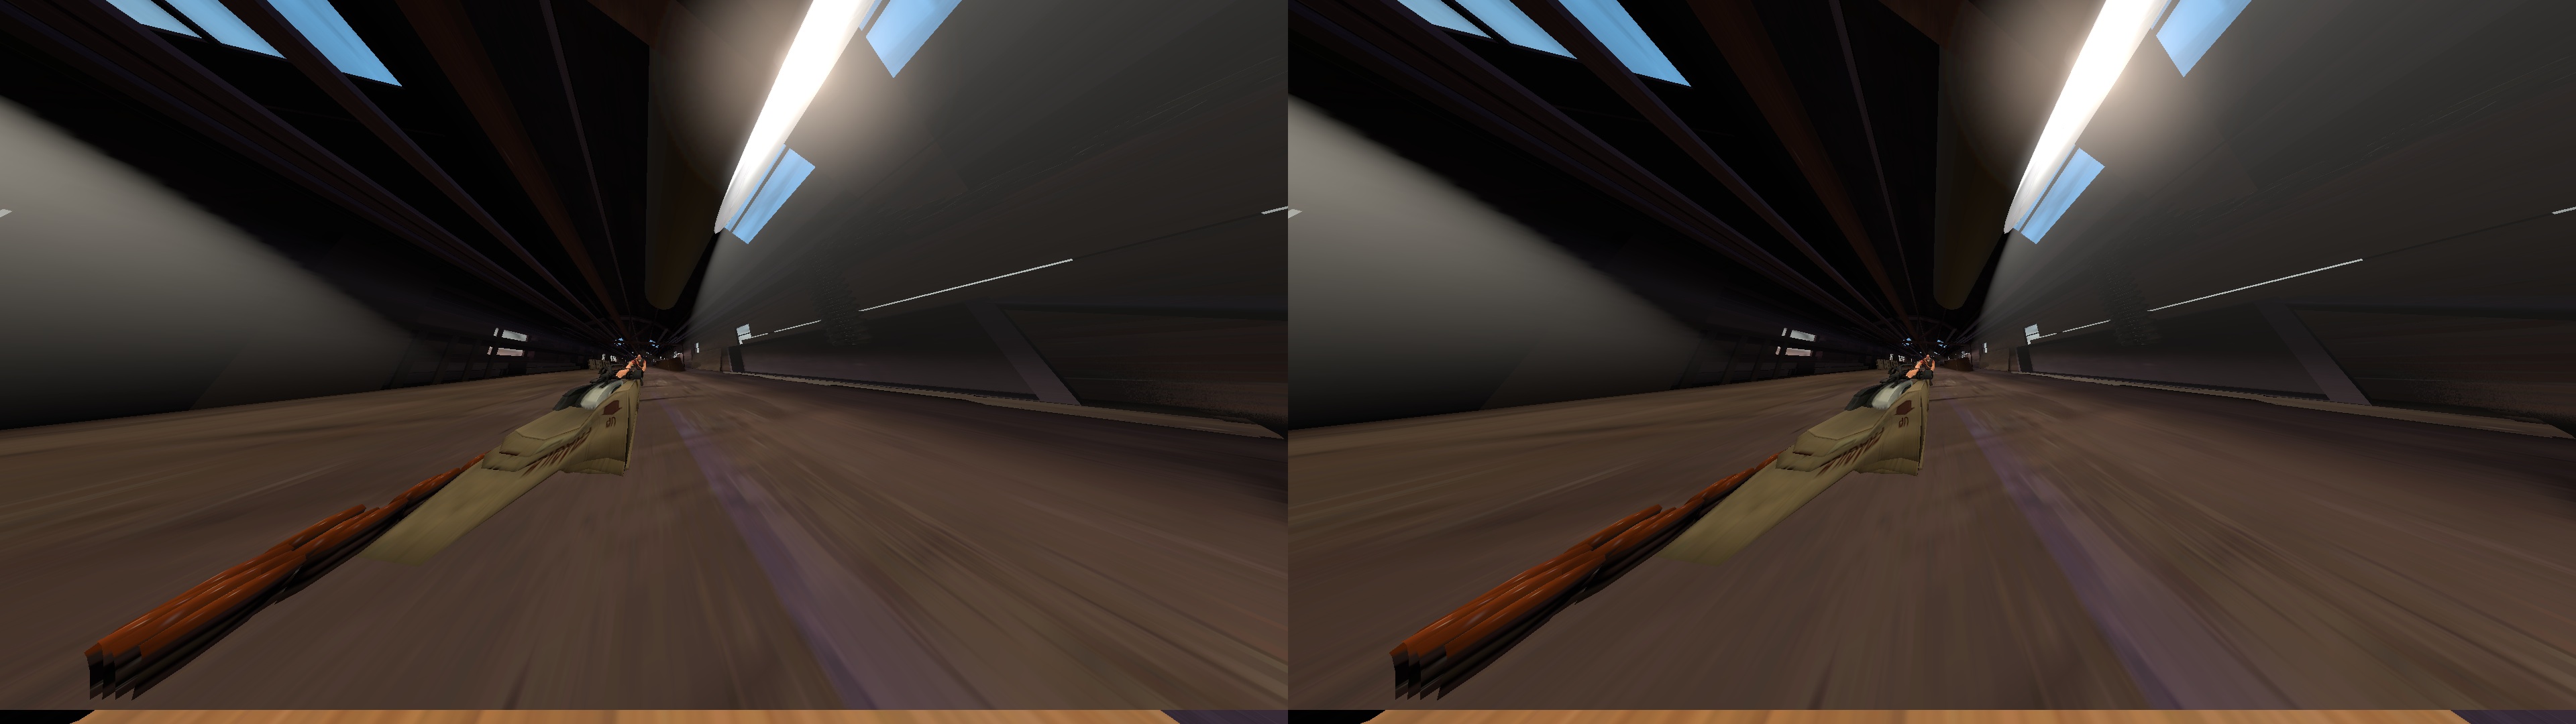
Your frames will look something like this.
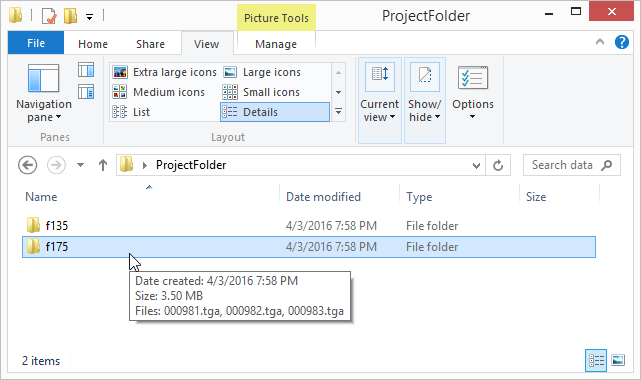
Now, create a project folder with "f135" and "f175" sub-folders. The main project folder can be named whatever you want, but the sub-folders must be named exactly. Your frames need to be the ONLY things in these folders. They will be matched in alphanumeric order, regardless of filename. SFMVR_STITCH comes with an example project directory for you to test with.
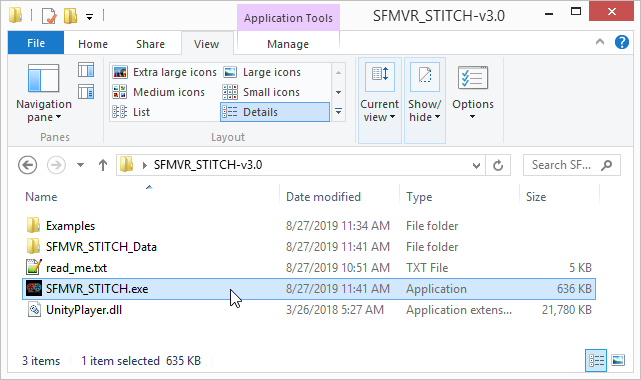
Run SFMVR_STITCH.exe
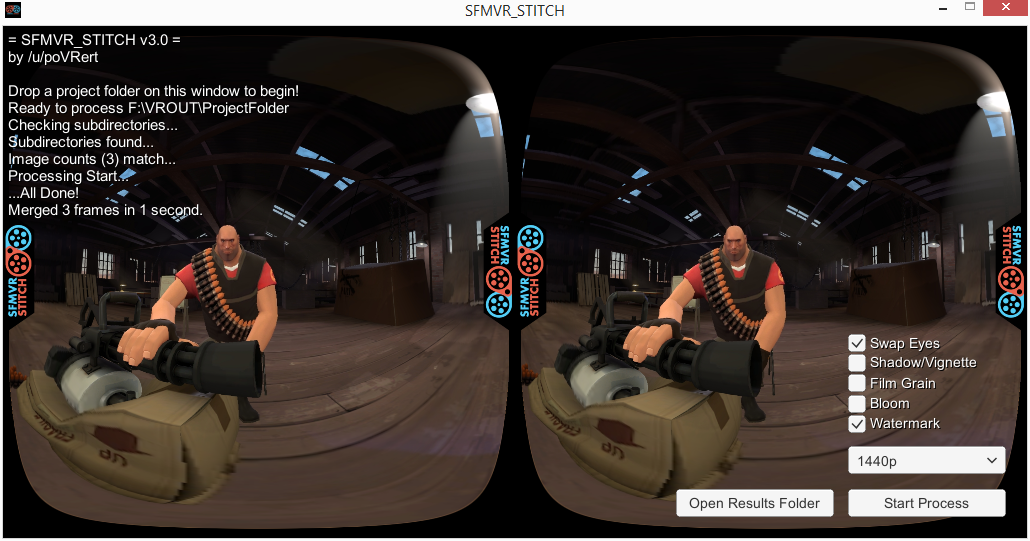
Drag and drop your project folder onto the window to load it. Follow the on-screen prompts about any missing directories or mismatched image counts. If there are any errors, you can drag & drop the folder again after you fix the issues.
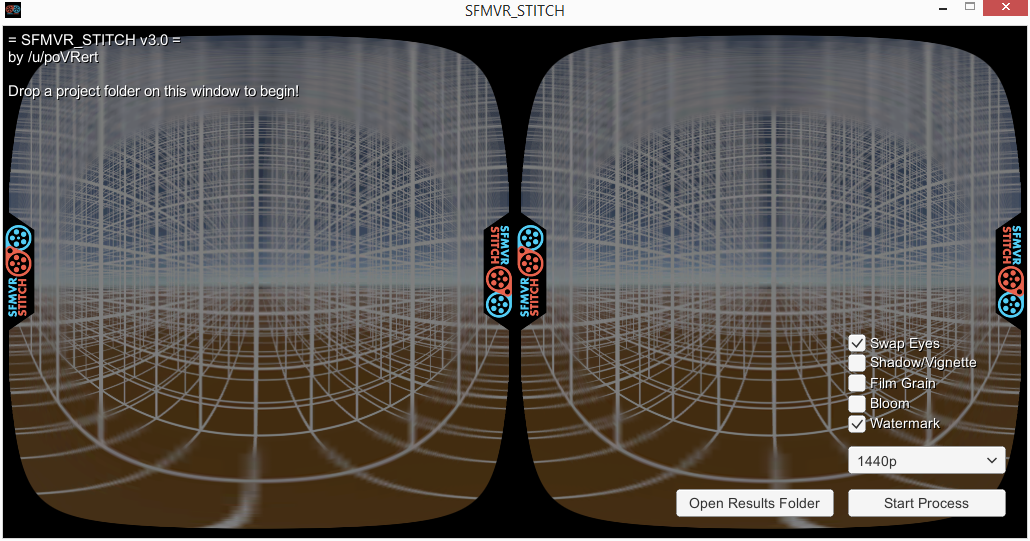
Pick an export resolution from the dropdown. This should be the same resolution you rendered (2160p) but there are options for up-sampling and down-sampling. 1440p is a common resolution that runs on the widest number of devices, but with modern codecs and a desktop PC VR setup, 2160p video will look the best. The lower resolutions are for testing purposes, and the higher resolution options are future proofing, in case they become useful someday.
There are also a number of additional options you can toggle with the checkboxes.
See the changelog for a detailed explanation of all the optons.
Once you're happy with your settings, click "Start Process" to begin processing the images.
A confirmation message will appear in the upper-left when everything is finished. A processing complete jingle will also play.
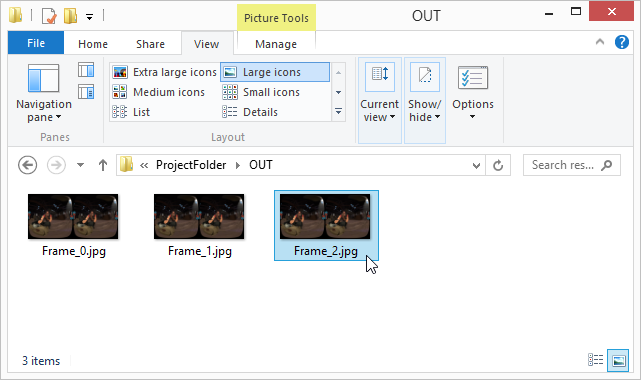
The final frames can be found in the ProjectFolder/OUT/ folder.
Use whatever tool you're already familiar with to make a video file from the frames. If you need help, VirtualDub is your friend. (Another tutorial approaches!)
Or do you have memcoder? COMMAND LINE TIME!
mencoder './*.jpg' -mf fps=60 -o output.mp4 -ovc lavc -lavcopts vcodec=libx264
FINAL NOTES
This new version of SFMVR_STITCH was rebuilt from the ground up in Unity. Special thanks to Zalivstok for testing and feedback.
This script is free to use, but please send me a download link to anything you make with it ;-)
PM me on Reddit at /u/poVRert if you have any questions. Thanks!